How to install a whirlybird roof vent fan? | Installation time for whirlybird roof vents | Solar vent vs whirlybird fan | How do whirlybirds work? | Do whirlybird roof vents work?
The whirlybird roof ventilation fans are a great way to cool off any building that you need hot air rising and moving out of faster than normal, helping disperse warm air within the roof cavity. These high-velocity fans mounted on your roof can move the hot air up from your attic and out through vents near the peak or ridge line, making it much easier to control your heat and cooling costs. Many people enjoy these fans because they have no hoses, which many find difficult to work with when installing new insulation or other materials in their home.
The whirlybird roof fans are mounted on your roof in much the same way as a regular vent with an electric wall switch but are installed a little differently. Because you need to be able to direct airflow from these fans, they’re designed to be mounted up or down, depending on which is better for how you want them to work. Mounting them inclined allows you to shoot hot air toward vents and prevent it from becoming trapped at the midpoint of your roof. This makes these systems more efficient than other vents and helps keep any buildup of humidity down when using ceiling fans or similar types of ventilation options throughout your home.
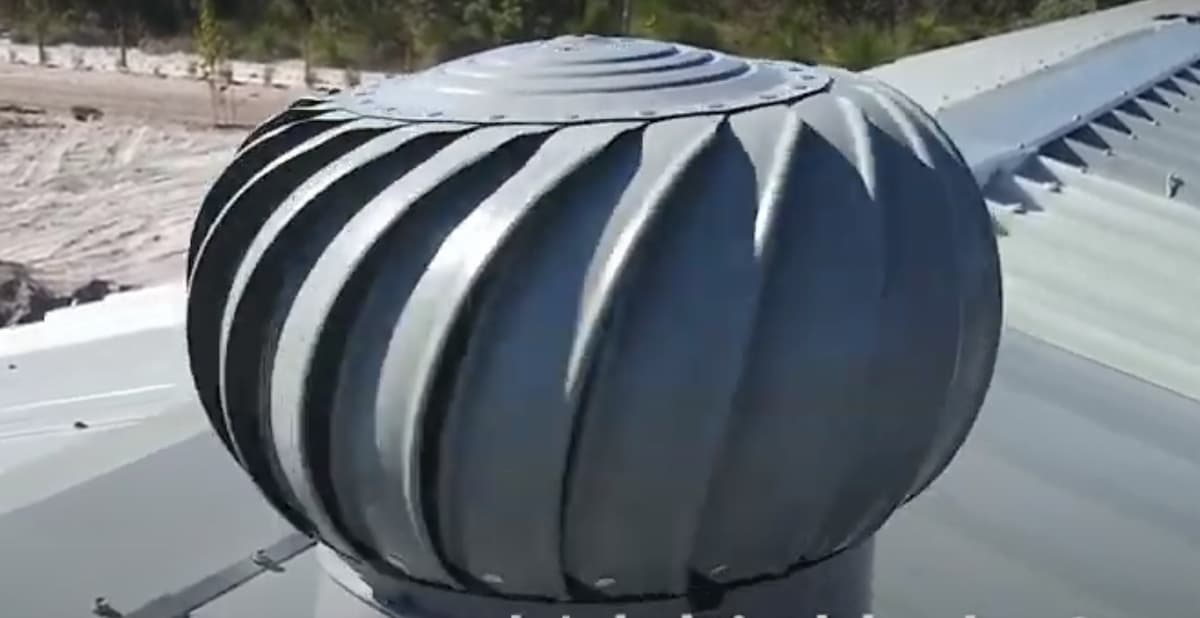
The whirlybird fan is a high-velocity roof ventilator that moves large volumes of air with its turbine vents. It’s an extremely powerful and durable system making them the top choice for weatherproof ventilation. They are made to be easily installed with minimal construction required, typically no more than the holes you need to drill in your ceiling or roof rafters in order to get the correct installation angles on them. These fans do not require any special kind of electrical wiring like many traditional attic fans do, so they’re much easier to install as well. Where convection can become an issue where normal ducted systems may cause some problems, these fans will keep the air in your home nice and cool. They can potentially assist an air conditioning system in cooling down the home.
The whirlybird roof fan is a great way to save on your monthly cooling bills while still keeping your entire house cool and comfortable. It’s a much more efficient system than many other options, it costs less to purchase, and can be installed by most people without any help from an expert or professional. A popular brand of whirlybird roof vents in Australia is Solar Whiz. If you’re looking for a new piece of equipment that will save you money every month, or even just want something that works better than what you have right now, then one of these fans could be exactly what you need to get the job done.
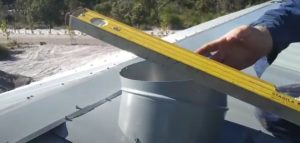
How to Install a Whirlybird Roof Vent Fan?
Now that you’ve got your whirlybird roof fans, its time to install them. The installation process is pretty simple as long as you know what you’re doing and have a little bit of knowledge about electricity. Otherwise, contact one of our pros for installation and they’ll get the job done properly in no time! Before starting on the project itself, turn off all electrical power to your home, just to be safe when working with electrical wires. Once the power has been cut from the area where you plan on installing the fans mount one on each side or if mounted directly over each other but with an opening between them for maximum ventilation then leave some space between them will work well too. As long as there is distance between them, there is a good chance they will produce some pretty strong air currents.
Set your whirlybird roof fans in place and connect the fan wires to a fused switch or circuit-breaker box using the appropriate wiring instructions for that particular brand of fan you choose. Being sure not to cross any other wires when doing this step. Once these connections have been made then it’s time to mount the roof ventilators on your roof carefully following any installation instructions provided by the manufacturer. Since most of these systems are designed with angled mounting points, it’s recommended that you do follow their recommendations as far as mounting them goes so air can move through them properly without getting stuck along its way into your attic.
Make sure to leave enough space around the base of the fan so air can be dispersed, if you have several fans installed then make sure to leave some distance between each one too. Also, don’t forget that your whirlybird roof ventilators will need to be cleaned and maintained just like any other type of ventilation system. If not, clogs and stuck air can cause a lot of problems that could potentially lead to serious health issues within your home.
Once they’ve been properly mounted using mounting brackets or similar methods, then it’s time to turn back on all electrical power throughout your house and start testing them out to ensure everything is working correctly before closing up those holes in the ceiling or covering over the installation sites with insulation or other building materials used for remodelling projects.
It takes a little bit of knowledge and preparation, but installing whirlybird roof ventilators is not hard to do with the right tools and materials on hand and the right amount of time to get everything done before turning on your home’s electrical power system again. The benefits are enormous as these systems are an extremely powerful way to create air circulation in your attic or throughout the rest of your home.
Installation Time For Whirlybird Roof Vents
It typically takes about half an hour to install on most roofs.
Once installed, these fans will work for years and automatically cycle your attic to keep it cool and dry inside, which prevents many problems with excess humidity or mould growth in your living space.
They can be used as part of a dehumidifier system if you prefer to control your own moisture levels rather than let nature do the work for you. Whirlybirds are a great way to move air within a home or building. And they use the power of gravity instead of electricity so there are no frills or moving parts involved. They just need some room under your ridge-line and some of the wind from your ridge-line to do what they were designed to do. Let the whirlybirds help move the hot air out of your roof cavity.
Solar Vent vs Whirlybird Fan
Energy-efficient roof ventilators are an excellent way to get a little bit more air circulating throughout your home, but if additional assistance is required then you can always look into adding a solar-powered attic fan or even one of the whirlybird roof fans.
If you’re not looking for anything too extreme then either will work just fine and bring much needed fresh air to hot and stuffy rooms in your house, where these types of vents aren’t available. Whirlybirds typically move more air than most other kinds of ventilation systems because they have a much larger range of motion making them perfect for those particularly hot areas that need some extra help getting cool again as fast as possible. On the other hand, solar-powered attic fans are great for passive ventilation.
Solar-powered attic fans are installed in an attic and they use the power of the sun to help ventilate the space without using any electricity, which is perfect if you’re looking for an energy-efficient option that’s still fairly powerful but won’t cost you quite as much money on your energy bill every month. Solar-powered attic fans can be a great alternative to whirlybird roof fans if you don’t need something with so much range of motion. Whirlybirds have one big advantage though over solar powered attic fans, which is that they will continue to operate even on cloudy days when there isn’t enough light from the sun hitting them to keep them going.
Although there are some brands where this is not the case, most whirlybird roof fans will continue to operate during periods of cloudy weather without any problems.
How do Whirlybirds Work?
When the hot air rises up through the roof rafters & roof cavities. It is forced to move out by the action of the fan blades. As it rises, it escapes out of the vent opening which is located in a ridge-line or peak roofline location. The higher you mount your whirlybird fans, the more heat and air movement you will have. As this hot air moves across the cross-sectional area, which is under your ridge-line there becomes a vacuum effect created within your roof space. This vacuum effect pulls cool air from outside into your attic space because warm moist air naturally seeks cooler areas to live. This naturally cycling method encourages natural ventilation to occur within a roof space. Installing the Whirlybird wind turbine system is not hard.
Do Whirlybird Roof Vents Work?
Whirlybirds are designed to work for you 24 hours a day, so they don’t require any maintenance or service at all.
They’re most popular in hot climates where humidity is an issue, but they can also be used wherever there is a need to ventilate a building or roof cavity space without using mechanical ventilation.