Installing pine garden edging is a project that you can complete in under an hour. In fact, the job requires no tools at all since treated pine garden edging comes pre-scored so it will snap at the predetermined depths.
The Why and How to Install Garden Edging?
Installing garden edging is a great do-it-yourself project that makes all the difference in your outdoor space. With a few simple tools and supplies, you can add a decorative touch to any garden design. Today we’re going to focus on treated pine edging and installing that around your garden bed. It’s a fantastic way to keep mulch in place around your flowerbeds, create curved pathways through the yard, or simply define your garden bed from the lawn.
What is Garden Edging?
Edging is exactly what it sounds like, a line of material that creates a border. Installed around your flower bed, edging serves as an accent piece and gives definition to the garden bed itself. It also keeps mulch in place so it stays where you want it. Edging makes a garden look finished and also works to define your design layout.
Installing Garden Edging
Before deciding on the length of your first row of pine edging, measure out a trial run section of the garden. You can use cut lengths of treated pine edging to form a square or rectangle, however, the joints will need to be staggered to provide an aesthetically pleasing line.
Drill pilot holes in the base of each corrugated upright exactly 6 inches apart along the length of your string line. Insert your plastic fasteners into the holes and attach the edging to the ground.
Paint over the fasteners with dirt which will help them blend into your garden edging, but you can even skip this step by pulling out some of the soil along your string line before inserting the fasteners. This provides a level surface for laying out your pine garden edging. You’ll need to leave some soil exposed at the edge for your first row.
Continue to snap the edging into place, one row at a time until you reach the end of your garden area. Overlap each row by 6 inches and cut off any excess edging material using a hacksaw or tin snips.
Installation should take anywhere between 30 minutes to an hour.
Once you have completed all the borders around your garden, fill in those areas with topsoil and plant as usual. You can also define any water features or other design elements using a single length of pre-scored pine edging that has been cut into a triangle shape. These are available at any hardware store and they offer a finished look to any type of garden feature.
How to Install Timber Garden Edging?
Installing timber edging ( wood edging ) requires a bit more time and patience, but it is still a relatively simple job. To get started with timber edging you’ll need to remove the turf from your garden bed using a sod cutter or spade. At this point, you can also add any topsoil that you may not have in place already.
Layout your treated pine edging along the edge of your garden bed making sure that it sits perfectly level. You can clamp the uprights together to provide additional support if necessary, then drill pilot holes into each upright at 15cm intervals ( use a tape measure if needed ) along one side of the landscape fabric.
Pull soil away from the landscape fabric to expose an area where you will be able to insert your plastic fasteners so they are completely hidden. Keep some soil intact along the string line. This way you will hold the edging upright while you are inserting the fasteners.
Drill pilot holes into the base of each corrugated upright at 15cm intervals, then attach your garden edging using plastic ground staples. If necessary, paint over the fasteners with dirt. This way they will blend in with your garden bed before proceeding to snap in your next row.
Layout your treated pine edging around all areas of your garden until it has been completely surrounded by sections of pre-scored pine uprights that have been cut into triangles or rectangles. You can also create straight lines for following paths and driveways through your yard. Triangular pieces provide an aesthetically pleasing finish to any area, but they also require a little more time and patience to install.
If you work slowly and steadily, your garden edging will be in place in no time. It’ll help to keep the measurements of each row written down so you can snap each successive piece into place simply by lining up the slots along the length of your string line. This is a great project for any DIYer who wants to add an attractive accent to their garden’s design or define an area around a water feature. No matter what type of material you choose, pine being my favourite, gardening just got easier with the addition of this functional yet stylish option.
What is Lawn Edging?
Lawn edging is the addition of a physical barrier between your lawn and garden. Installing landscaping timbers is one of the most cost effective ways to keep lawn grasses contained, but you can also use untreated pine or cedar fencing panels if you don’t mind spending a little extra on materials. Either way, it’s an easy project that anyone can do.
The best part about adding landscaping timbers to the perimeter of your lawn is that they serve a functional purpose as well as an aesthetic one. The raised edge will keep grasses contained and it’ll also define patterns or borders in your yard so you can create a more interesting landscape design.
Installing Treated Pine Garden Edging How-To
1. Prep your garden.
Remove grasses, topsoil and any rocks or weeds from the area where you’ll be installing treated pine edging. Make sure to scrape away any debris so that your string line will provide a clean guide for snapping in the uprights.
2. Layout & snap your first row.
Lay down your string line, making sure that it is perfectly level. Clamp the uprights together if necessary and drill pilot holes at 15cm intervals around one side of the string line.
3. Drill pilot holes.
Hold the upright in place while you drill a pilot hole into its base at a 15cm spacing either vertically from the other upright or along the width of your string line from one end to another.
4. Secure with plastic staples.
Pull dirt away from your string line to expose an area where you can snap in your first fastener so it’s completely hidden under soil . Use unused strings as guides for snapping in additional timbers on both sides of your first row to create straight lines for borders or around garden bed.
5. Snap in your next row.
Assemble the next row of garden edging, aligning the triangle cutouts on one end along your string line. Make sure that each upright is perfectly level and clamped together if necessary.
6. Drill pilot holes.
Pilot holes should be drilled vertically down through the base of each new upright at 15cm intervals or along the width of your string line from one end to another.
7. Secure with plastic staples.
Pull dirt away from your string line to expose an area where you can snap in your first fastener so it’s completely hidden under the soil. Use unused strings as guides for snapping in additional timbers on both sides of your first row to create straight lines for borders or around the garden bed.
8. Install the remaining rows.
Snap in your next row of pegs along both sides of your string line to complete the first length of the garden edge.
9. Cut & fit any remaining pieces.
Measure and snap additional uprights into place where necessary until you have formed a neat border around your entire garden bed or lawn area.
10. Trim around beds & driveways.
Trim off any uneven or excess pieces of plants, or edge material after you’ve finished adding uprights along the perimeter of your garden bed.
What is the Best Shape for Lawn Edging?
The great thing about adding landscape timbers to the perimeter of your lawn is that they serve a functional purpose as well as an aesthetic one. The raised timber edging will keep grasses contained and it’ll also define patterns or borders in your yard so you can create a more interesting landscape design. The best shape for a lawn edging is one that’s not perfectly straight and at a 45-degree angle, but it can also be shaped like a diamond or any other design that you can create with plastic landscape timbers.
Lawn edging shapes are not perfect, so don’t worry if your lawn edging veers off at a slight angle or you create an enclosed diamond-shaped design with landscape timbers to keep the grasses in check.
Plastic Edging
Plastic edging is different from hardwood stakes and has such a clean, professional appearance and is so affordable that you can use plastic edging to define almost any edgdesign in your yard for your plants. If you want to draw straight lines along the perimeter of your lawn, just follow a string line with treated pine uprights. You can also create twists and turns by placing garden edging around curved borders or turn ordinary spaces into striking garden focal points by laying down a straight line of edging.
You can also use plastic landscape edging to create interesting patterns around your yard or gardens. You don’t have to follow the same type of layout, you can try running an edging border across each corner in different directions, for example, or place it at 90-degree angles to each other and create intersecting patterns around your yard.
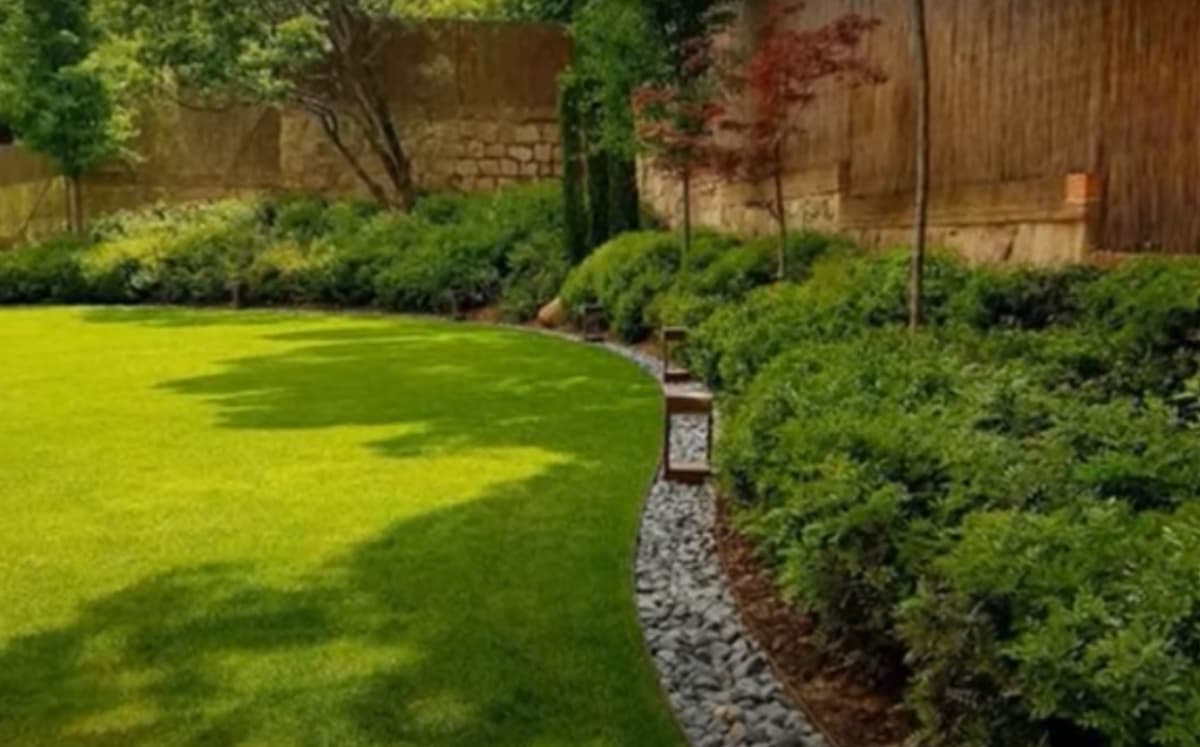
You can also use plastic edging to define borders around a flower bed, tree pits, and a raised garden bed. It’s particularly useful for lawns that slope because it will help prevent grass from spilling out of your landscaping area, which saves you time when cutting the grass and reduces the risk of erosion.
The Best Soil for Grass
The best type of soil in your yard is the kind that drains well and doesn’t compact when walked on or cut with lawnmowers. Not only does it keep grass healthy, but you’ll also reduce the risk of erosion in areas where dirt is not as stable.
If you have heavy clay soil that doesn’t drain well, then create raised garden beds using landscape timbers or another type of edging to define borders. You can also add products like rubber mulch to the soil so grass grows in more easily.
Mix soils together to create a better texture if you have rocky, sandy loam soil that is full of compacted chunks of dirt. Spread out your topsoil and dig it into your existing grass to create a rich, healthy lawn.
If you have clay soil that is full of rocks and debris or sand that drains too much water away from the grass, then you can try adding topsoil in intervals over compacted dirt to make it more porous so water can drain through it more easily. You might also want to add sand with the topsoil so you introduce a mixture of textures and improve drainage.